training cats (or why you have to make it easy for them to behave!)

A lot of people will say that you can’t train cats or get them to follow rules. I think that’s mostly a misconception! Sure, there are some cats that don’t give a damn about what their humans think of them and will do exactly as they please (or even do exactly what you don’t want to them to do out of spite). But I think most cats are very trainable if you approach it the right way. This post isn’t about teaching tricks (although I have successfully taught tricks to cats before!) but about training cats to respect boundaries.

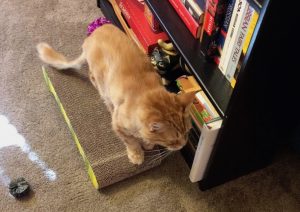
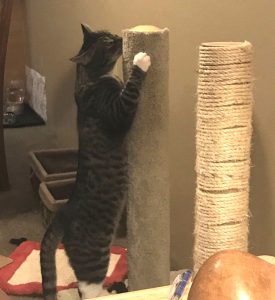
I’ve found that the key to setting boundaries is consistency and making it really really easy for the cat to do the right thing. The latter is why, for example, there are 7 scratching posts in my two bedroom apartment. Each room (the two bedrooms and the main living area) has at least one sisal post for Tycho and one carpeted post for Gus. They never have to look far for a post when the urge to stretch and scratch hits them, so neither cat has ever scratched my furniture! I didn’t have to use deterrents like sticky tape or squirt bottles to get them to realize that scratching posts are their only option for clawing. There’s nothing wrong with using deterrents (some cats do need a little extra help to get the message!), but if you find yourself always having to scold the cat for scratching the wrong thing, maybe you haven’t make it easy enough to scratch the right thing!

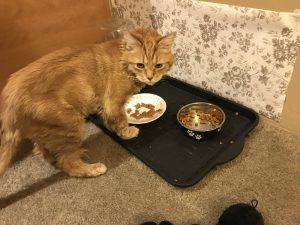
I recently found myself in a situation with Gus where I needed to make it easier for him to do the right thing and respect the rules. One of the very few rules for my cats is that they are not supposed to be up on the dining table or the kitchen counters. Admittedly, I have not been consistent enough about enforcing the dining table rules:

This is mostly because I let the cats sit with me while I eat, and that sometimes leads to front paws on the table (and then that leads to Tycho thinking, hey, why not all 4!). This behavior is my own fault, so I just tell the cats to get down if I see them up there or pick them up and put them back on the chairs. No squirt bottles or loud scolding because the behavior is my own fault.

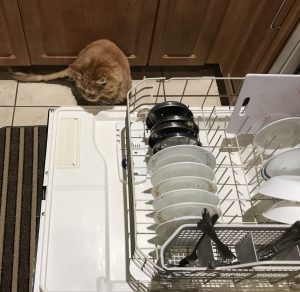
Unlike the sloppy table rule enforcement, I am very strict and consistent about the kitchen counters. I do not want them anywhere near my food preparation, and I don’t want any burns or cuts if they happen to get up there while I’m cooking! Gus got the message very early on that he wasn’t allowed up there (he’s very responsive to me saying “no” or picking up the squirt bottle, I don’t think I ever actually squirted him). And he never gets up there when I’m in the room. But there was a problem, because I frequently would walk back into the room and see him on the counter! The problem was that there was a huge incentive for him to get up on the counter next to the sink: the window above the sink looks out into our backyard catio (which the cats only get to use under direct supervision). Gus loves that catio:

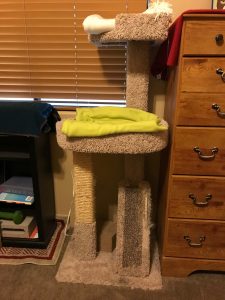
And he sees the catio as his territory to patrol. There are three windows that look out into the backyard: the one above the kitchen sink,  one on the back door in the kitchen, and one in my bedroom. The cats have a lovely cat tree and bookshelf that lets them look out into the yard from my bedroom window, but you can’t see the catio from there. You can only see the catio from the kitchen. Gus really really wanted to be able to look out into his catio to make sure it was free of intruders, but there was no way for him to do that without breaking the kitchen counter rules.

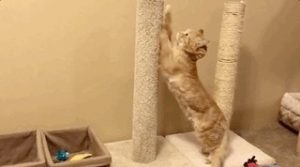
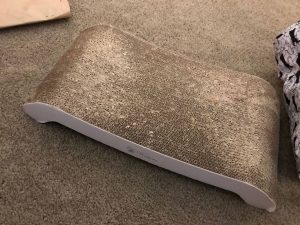
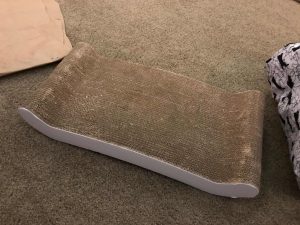
That was an unfair position to put Gus in. He knows he’s not supposed to be up on the counter next to the kitchen sink, but he really needs to make sure his territory is clear! So this week I came up with a solution to make it easier for him to follow the rules. I built a viewing shelf on the back door for him to sit on (and put a stool next to it so he could easily get up and down):

a view of the kitchen wall with the new shelf built on the door

Now he can check on his catio whenever he wants without having to break any rules! After I built it, I plopped him up there and gave him a lot of positive attention to make it clear it was his shelf. He was very happy:

He doesn’t like breaking rules, so I guarantee that’s the end of him being on the counter! So now we’re both happy!

Gus had a legitimate need (cats are territorial!) that was making it impossible for him to obey my rules, so I had to give him an approved way to keep an eye on his territory. Sometimes you have to get creative to make the rules easier to follow! So next time you get frustrated that you can’t get your cat to follow the rules, stop and think about what you can do to make good behavior easier!

quick cat grooming tip!

Back from a bit of a holiday hiatus with a short post today containing a cat grooming tip! I have some fun post ideas that I just didn’t quite have the steam to tackle over the holidays, but hopefully I’ll take them on soon. But in the meantime, I thought I’d post about an inexepnsive, neat little grooming tool that many cat owners probably haven’t run across!

This is a tool I used regularly on my horses, but have found to be equally (or even more!) useful for the cats. It’s a Slick ‘N Easy grooming block (amazon link). It’s basically like a super lightweight pumice stone that captures loose hair when you brush the stone along the cat’s coat.

Tycho being groomed with the slicker stone

The result: lots of removed hair!

example of all the hair the stone pulled off

The best part about this tool (for me) is that Tycho doesn’t mind it nearly as much as a brush! I wrote about how Tycho *hates* being brushed in the post about his haircuts. When I try to use any sort of cat brush or shedding blade (metal tools like this one that are great for getting fur out of cooperative cats like Gus!) on Tycho, he gets angry very fast! I usually only get like one or two short passes over a single part of his coat before he starts trying to bite me. But he will let me groom him with this slicker for several minutes before getting annoyed! Although he did still (fairly gently) lay teeth on me right after the above grooming session to let me know he was done:

It doesn’t help with de-tangling longer hair (so he still has to have his haircuts!), but it does help remove some of his undercoat! And it’s gentler that many of the brushes because it doesn’t make contact with his skin, it just slides over the surface, dragging out hair. It works well on Gus too, I usually finish his grooming session with the slicker stone. I do recommend wiping the cat down with a slightly damp cloth afterwards to remove any little particles from the stone that come loose. The stone is designed to kind of disintegrate with continued use as the surface gets less abrasive. When the surface gets dirty, you just rub it on concrete to remove the outer layer and it’s good as new! It’s a tiny but messy, so we usually do our grooming sessions outside on the catio. But it’s super useful, so try it out if you aren’t happy with your current cat grooming tools!


Kitty haircut time! (or how to shave a cat)

I know I said in my post about heated beds that Tycho had a month until his next haircut, but I changed my mind this morning. I decided it was better to shave him again now so he has a bit of time to re-grow his fur before it gets  colder here! He’s fine inside no matter what, but he can get a little cold out in his catio when he’s just had a haircut! Anyway, I thought I’d write a bit about the challenges of longhaired cats, why Tycho gets shaved, and tips if you are brave/foolish enough to shave a cat. If you just want to see a time lapse of today’s haircut, see this youtube video: https://youtu.be/yjPHsZ-buC4

I want to start off by saying that (in the absence of health, behavioral, or other problems) cats are usually better off not being shaved. It takes some effort to maintain a longhaired cat’s coat, so keep that in mind before you get one! You really have to keep on top of their coats or they can get nasty (and painful!) mats in their fur. It is particularly important to get the right tools for longhaired breeds with thick undercoats to make sure you remove some of that undercoat when you brush them. But with regular grooming to keep matted fur away, most longhaired cats are good to go.

Tycho, however, presents a challenge. He hates being brushed. You get one, maybe two strokes in with the slicker brush before he’s trying to bite you. I presume his original owner never groomed him when he was little. Generally if you start when they’re kittens, they will grow to love being brushed! But not Tycho. And no amount of patience and practice on my part has made him any happier about being brushed. He used to be equally bitey about nail trimming, and he’s now 100% ok with that, but brushing is just clearly a no go.

Tycho’s fur also is a bit weird. It’s very difficult to get the undercoat under control because he doesn’t shed like a normal cat (he sheds, just not much and not the undercoat). Also, Tycho is terrible about grooming himself. He’s never been very good about it. As evidence of this, in the 11 years I’ve had him he has never had a hairball, probably because he doesn’t ever lick up much hair! He does at least groom his toes and sometimes his legs, but that’s about it. This has only gotten more true as he gets older. Many older cats have trouble grooming themselves and require more help from their humans to keep fur from getting matted.

So all of this leads to Tycho being shaved regularly. He needs to be shaved about every 3 months or so to keep from getting mats. He started getting haircuts maybe a year or two after I got him, and those haircuts were done by professional groomers (I used the groomers at PetSmart, they were very good!). They generally did a lion cut, because most of his trouble with mats is on his belly and back legs.

Tycho showing off his lion cut
Tycho with a professionally done lion cut

But as he got older, I started to worry more about the stress of going to the groomer. He would always be there for a few hours because they would bathe him then shave him. So I decided to give it a try at home. I will stress here that shaving a cat is not easy and they’re not the best animal to learn on if you’ve never used clippers before. So I can’t say I super recommend doing this yourself! I had experience clipping horses, so I know my way around clippers. And Tycho is extremely cooperative about haircuts in the scheme of things. I certainly think that your cat’s first haircut needs to be done by a pro. Try to stay and watch to get a sense of how the cat reacts. Try this at home if and only if your cat is cooperative and there’s some compelling reason why the pro isn’t a great option (like stressful car rides, etc!) and you have pre-existing clipper skills. You also need to watch a bunch of cat clipping videos to see how to approach the unique challenges of clipping a cat (I’m going to give some pointers below, but definitely do more research!). Otherwise, leave it to the pros!

If you are going to try this at home, you’ll need some quality clippers. If you’re not spending of order $80-100 on those clippers, you’re not getting good enough ones for the job. They also need to be the kind that plug in, not battery operated or rechargable. Battery operated clippers don’t have the power to quickly clip through the thick undercoat of a longhaired cat. The recommended blades for cats are #10. I buy the part ceramic ones because they stay sharper. I typically get 3 or 4 haircuts out of a pair of blades before they get too dull. If your cat tolerates a bath before the haircut, the blades will stay sharp longer, but Tycho hates baths. So I just replace my blades more frequently. You will also need a can of blade lubricant/coolant. If you go to a nice, bit pet store (like PetSmart), the employees there can help you find all the right stuff!

Once you have your clippers and blades, you’ll need some towels, your regular cat grooming supplies, and lots of treats. You also should have a pet first aid kit with styptic powder, just in case you cut your cat (you should have these anyway). I’ve never cut Tycho while grooming him, but better to be prepared!

clipper coolant, brushes, scissors, clippers, and treats on top of two towels
Things you need to gather before trying to shave your cat

You will also need to accept that you are going to make an unholy mess during the haircutting process. I reccomend doing haircuts in your largest bathroom and doing  it right before you plan to vacuum the whole house (once freed from the bathroom, your cat will drop little tufts of fur all over as they run away).

The position for getting started is to kneel on a towel towel with your legs making a v-shape, and hold the cat between your legs up against your torso. The towel is important to give the cat some traction (sliding around on tile is no good!). I always trimming Tycho’s nails (believe me, you want to do this first!) and rewarding him with greenies treats. Then I usually start the clipping with a few passes in the direction of hair growth to get rid of the bulk of the hair (followed by more greenies!). Then I clip against the direction the hair grows to get a smooth cut. You have to be super careful to hold the skin taut and flat so you don’t cause any cuts! This is especially important when trimming bellies and near legs where there is loose skin. When in doubt, don’t risk trying to get a smoother/closer shave! Just let it go and know that the haircut isn’t going to be perfect. You also need to check the temperature of the clipper blades frequently. Those things get hot (which is why you need the coolant!). Ever few swipes, I check them against my own skin to make sure they’re not hot yet.

Tycho is super cooperative about being shaved, but I still make sure to take lots of breaks for treats! I’ve gotten a lot faster over the years, but the haircut process still takes me about half an hour. So we take a few breaks to just sit and purr in-between particularly tricky areas. I save the insides of his back legs for last because that’s the part he will growl and hiss about. Unfortunately, that’s where he gets mats, so it must be shaved! One tip for making problem areas go more smoothly is to briefly cover the cat’s head with a towel when you’re doing their least favorite part, especially if they are prone to biting. It would also be best to have a second person to help hold the cat (I don’t do that because Tycho is happier if it’s just me, but a second set of hands would be nice!). Whatever you do, keep the time where the cat is upset short! When I started giving Tycho haircuts, I was slower than I am now, so I used to spread Tycho’s haircuts over two days to minimize the unpleasant bits. He really is good and even purrs through a lot of the shaving! But I get about a 30 seconds to a minute to do his belly and back legs before he gets really upset. So know your cat!

My haircuts will never look as good as the professionals manage, but they get the job done with a minimum of stress for Tycho! I generally stick to a lion-ish cut (where you leave a bit of “mane” around their neck and a tuft on their tail). I once tried to do a dragon cut, but I just don’t have the skills and had to just finish shaving his back! Made for funny photos though!

You can see the video of today’s haircut (sped up by a factor of 10) here:

You can hear some funny, sped up, high-pitched growling when I do his legs! But rest assured, he’s ok and forgave me. Within 10 minutes of the end of the haircut, he was back purring in my lap. Then he (as I predicted) went for a nap in his heated bed!

If you’ve been brave and or foolish enough to give your cat a haircut, let me know how it went in the comments!


heated beds are an almost guaranteed feline hit!


It’s finally starting to cool down, even in Arizona. If you follow G&T on twitter, you will know that that means Tycho’s heated beds are starting to see more use again! They’ll get even more use after his next haircut, which will be in about a month! I leave at least one plugged in most of the year (the apartment is air conditioned after all), but the heated beds really become kitty magnets when the temperature starts to drop.

There are a large number of heated cat bed products available (at a wide range of prices!), but I’ve found the cheapest option to be purchasing K&H pet bed warming pads (which can be found here on Amazon) and incorporating them into existing bedding. These pads don’t use too much electricity, but they do get quite warm. So you have to enclose them in at least several inches of padding to make sure they’re not too hot for your cat! I typically wrap the pads in several layers of a folded fleece blanket and nestle the whole bundle into one of the larger pet beds. (You can buy pet beds with slots designed for heating pads, but as all my pet beds come from the discount store, I don’t have any of those!)

Tycho sprawled across a blanket wrapped K&H heating pad to make a wonderful heated bed
Tycho really enjoying his heated bed.

Another great option for padding out the heating pads are Purr Padds (that’s a brand name, Amazon link here). I’ve got a long heating pad on the back of the couch folded into a blanket with a Purr Padd on top and that is by far Tycho’s favorite spot in the house!

Tycho on top of a heated purr padd
Tycho loves Purr Padd brand products. Especially when combined with a heating pad!

Gus is not as into kitty beds as Tycho. He prefers the comfort (and crinkly sounds!) of plain brown paper for many of his naps. But even he is sometimes drawn to the fleece wrapped heating pad in the cat tree perch!

I’ve been pretty happy with the durability of the K&H heating pads (I finally had one die last year after 10 years of use, so not bad!), and I like that you can buy a variety of sizes to make any of your cat’s favorite sleeping spots warmer. Plus the small pads (which are a nice size for cats) can often be found for only $10! I can also vouch for the same company’s very durable outdoor heating pads which are great if you have a catio or screened in porch for your kitty. Growing up our barn cats like Kepler really enjoyed having similar heated perches in the cold winters! I know some people put them out for feral kitties too.

Become your cat’s favorite person by getting them a heated bed!


making mealtime easier: corelle dishes and greenies pill pockets

Breakfast time here is a bit of a production. The cats are well trained not to wake me up for breakfast (waking me up delays breakfast without fail), but once I’m up, feeding G&T is a multi-step process. First, Tycho has to take an antacid pill every morning before breakfast because his stomach gives him trouble (I still have to clean up more cat puke than I’d like, but the pepcid ac helps!).  Then I have to mix a joint supplement/mild pain reliever into Tycho’s wet food (he’s an old man with a few mild health issues!). After the cats finally get to eat their wet food (the wait feels like forever to Gus!), I’m left to clean up (and then finally get to eat my breakfast!). Cleanup usually involves having to wipe down Tycho’s eating area because he’s pretty messy. I actually attached shelf liner to the wall behind his placemat because I got tired of scraping dried cat food off the paint.

Tycho in front of his placemat and backsplash
This is where the messy eater eats

Two things have helped streamline breakfast a little bit. The first is using Greenies pill pockets to deal with Tycho’s daily pill. They’re little squishy pockets that you put the pill into and seal the opening by mushing it together. And because they’re Greenies brand, and Tycho loves all things Greenies brand, he happily eats it like a treat, pill and all! I know that these don’t work for all cat owners (some cats figure out that there’s a pill inside and spit it out), but if you have to give your cats a pill, they’re worth a try! It’s certainly less of a nightmare than trying to shove a pill down Tycho’s throat every morning!

The second thing that helps with mealtime was switching to using plates to feed the cats instead of bowls. There are a few benefits here. First, the plates fit in the dishwasher more easily than the bowls, so breakfast cleanup is simplified by not having to think about the geometry of how best to fill the dishwasher with bowls while making sure everything will come out clean.

Plates fit easily into the dishwasher!

The plates also mean the cats eat more of their wet food. No more food smushed into the corners of bowls where it gets overlooked! Gus almost always licks his plate totally clean! Tycho also strongly prefers eating from a plate, possibly because of a thing that’s referred to as “whisker fatigue“. Basically some cats don’t like eating from bowls because their whiskers rub against the edges of the bowls. I originally started using plates because I would run out of clean pet bowls before the dishwasher was full enough to run. When I noticed Tycho preferred them, I decided to buy the cats their own plates for wet food (I do still use bowls for their supplemental dry food because the bowls keep those crunchies better contained!).

The last benefit is that small plates are a lot cheaper than pet bowls! I bought G&T a variety of small plates and tea saucers from Goodwill for less than $1 each. I went with Corelle brand plates because Corelle is lightweight and very difficult to break (my own set of dishes is Corelle too!). They tend to be relatively easy to find at Goodwill because they’ve been very popular over the years (though they’re pretty cheap new too, so you could pick then up at Walmart of Target!). Plus they come in lots of different patterns, so G&T have quite the eclectic set to eat from!.

Because I use 6 plates a day for the cats (the spoiled brats get breakfast, dinner, and a bedtime snack! but at least only breakfast comes with the added complexity of medications!), the fact that I could cheaply buy a bunch of these and that they fit compactly in the dishwasher is really nice! Now we never run out of clean kitty dishes!

my favorite scratching posts/pads (or why my furniture remains unscathed!)

People who have been to my apartment have noticed that there are scratching posts (and other things meant for cat scratching) in every room. I feel that this is they key to keeping G&T happy and keeping my furniture free from kitty claw marks! This post will share some tips for finding your cats the kinds of scratchers they prefer as well as some specific product recommendations (bottom of the post) based on my years of cat product testing!

The first thing you’ll want to figure out is whether your cat prefers horizontal or vertical scratchers! Tycho has zero interest in scratching things on the floor. He thinks those horizontal cardboard  scratchers are only good for sitting on. When he exercises his claws, he wants a good vertical stretch!

You will also need to experiment with different materials for the scratchers. Gus likes both horizontal and vertical scratching, but he is mostly interested in carpeted scratchers. He will scratch cardboard pads, but he loves to attack the carpeted bases of the scratching posts. For his vertical scratching, he won’t touch the sisal rope covered  posts that Tycho likes (I think they are too rough for his sensitive paws!). He only wants carpeted posts. I figured this out by looking at the base of our cat tree, which was only worn in a few (carpeted) places. Once I bought a soft, fully carpet covered tall post, he was a happy kitty!

It can take a little trial and error to sort out a cat’s preferences. Before I bought Gus the carpeted post pictured above, I had purchased a post covered in a more industrial type of carpet (think those carpet squares they use in office buildings). That was a bust and he never touched it. But I had to keep it for several months to be sure! When I first bought Tycho a tall scratching post, he ignored it for at least 2 or 3 months before it became his favorite thing ever. It’s worth spending the time and money to figure it out though, because finding a favorite scratching apparatus will (hopefully!) save you and your furniture from harm! During the search, it is handy to have other cat owning friends to trade with. While sorting out Gus’s preferences,  I was able to trade with BobTheBlob of @ObservatoryCats fame, giving him that industrial carpeted scratcher Gus hated in exchange for a cardboard one that Bob ignored.

Specific Products I Like

I’ve purchased a lot of scratchers over the years. These are some products currently available on Amazon that I recommend based on quality and price. (Post and links edited 11-18-17 to add: All links are to Amazon pages. If you use these links to purchase these items, I might earn a small fee, see post here.)

Tall scratching posts: Classy Kitty 32″ Sisal Post and Classy Kitty 32″ Carpet Post posts. I have 5 of these, including the ones pictured above. They cost about $20-$35 each (price fluctuates), which is likely way cheaper than what you’ll find at your local pet store. They are nice and tall, and the bases are sufficiently heavy for my ~11 pound cats to go nuts without fear that the posts will tip over. If you have a ~20 pound cat, I’m not 100% sure they would be stable enough, but you can always stick a concrete paver block on the base to stabilize it, which is what I had to do with my cat tree. My only complaint is that the carpeted posts shed little carpet fibers that I have to vacuum up. I suspect that also means they won’t last years and years without needing to be replaced, but that’s a small price to pay for Gus to have his fun. The sisal posts are super durable and barely show wear after almost two years of Tycho’s best efforts to shred them.

Leaning scratcher: This 25″ lean-it scratching post is the one Gus didn’t like (because it was the wrong kind of carpet). But I liked the quality for the $20 price tag, and it works well as a horizontal or vertical scratcher (it leans against the wall very nicely with the grippy rubber ends).  If your cat is into that more industrial type carpet, I think they would like this!

Cardboard scratchers: The PetFusion brand scratchers are hands down the best in this category. I won’t purchase anything else. The basic one is $20 and lasts nearly forever. The cardboard is much denser than other brands and doesn’t shed off that super annoying cardboard confetti when the cats scratch it. The one pictured below is almost 2 years old.

If you have any favorite scratching products, let me know in the comments!